
Documentation › User Guide
7. Biometric terminals
A ZKTeco terminal at the gate can mark attendance without anybody touching a keyboard. Punches arrive at the system by themselves as staff and students clock in.
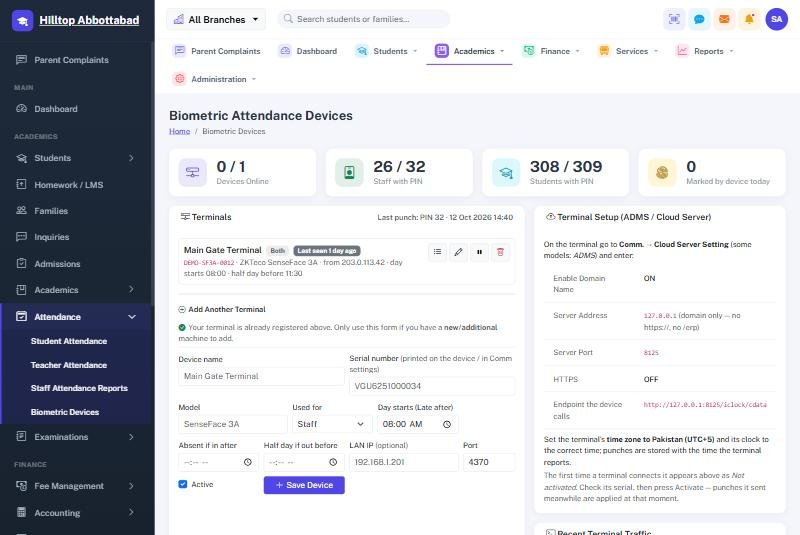
Connecting a terminal
- On the device, open Comm. › Cloud Server Setting (some models call it ADMS).
- Enter the server address and port exactly as this screen shows them. Leave HTTPS off unless told otherwise.
- Set the device's time zone to Pakistan and check its clock. A wrong clock produces wrong arrival times.
- The first time it connects, the terminal appears here as Not activated. Check the serial number against the sticker on the device, then press Activate.
How punches become attendance
Every punch is kept exactly as the device sent it. The system then works out each person's day from those punches: the earliest is the arrival, the latest the departure, and the day's status follows the late and half-day times set against that terminal.
Marked by hand always wins
A device never overwrites a day a human has marked. If the office recorded leave for a teacher who then touched the scanner on their way past, the leave stands.
Ready to see it live?
Book a free demo of School Smart ERP for your school or college.